Tuesday, August 24, 2010

The Shooting Bag, Part 2

(continued from part 1)


The bag hangs on a strap that's 2" wide, from left shoulder to right hip. The strap is made of a long piece with holes in it (like a belt) and a shorter piece with a buckle. The differences in lengths keeps the buckle off the wearer's shoulder. Here's the buckle:


The powder horn attaches to the strap using it's own buckles. These are situated so they're about 8" above the bag.


Here's a close-up of one of the powder horn's buckles - it accepts a 1/2" wide strap.


Once the straps have been stitched on, the front flap is stitched on. It's stitched through the back of the bag as well as the straps, strengthening them. That's why the flap goes on last.


Here's the completed, unstained pouch. The straps still need to be cut to length.


And here it is, stained, with my reluctant model.


And Dottie and the left, Spice on the right.


Spice Girl!


After it was done we found out it's nearly too small. If I make another I'll make it wider. And the alcohol in the dye stiffened the leather considerably. It was horrible. I pretty much soaked the bag in neatsfoot oil and worked it like a baseball glove until is softened. It's usable now and will get better over time.

I wasn't too happy with the dye. It left lots of streaks. By the time I got the streaks evened out the bag was darker than I wanted. Still looks ok. But I think I'll try a different dye next time. The book I linked in Part 1 gives a recipe made of iron and vinegar. I think I'll experiment with it.

In any event, we're ready for the range!

Monday, August 23, 2010

The Shooting Bag, Part 1

A shooting bag is a small bag that includes everything a black powder shooter might need for an afternoon of shooting. I made one based upon the North Hampton pouch from Recreating the 18th Century Hunting Pouch by T.C. Albert. This pattern includes a gusset to increase the bag's capacity, a leather strap, and hangers for a powder horn. I'll be attaching the powder horn I made some time ago.

I bought all my supplies from a Tandy Leather store that's basically across the street from me. The owner was very helpful when I had questions. I bought about 10 square feet of 4 or 5 ounce leather. This is probably enough for 3 bags. It was hard to stitch sometimes; I think 3 ounce might have been better.


Here we see all the major pieces. The front and back are to the left, the flap is to the right, some reinforcements are below, and the gusset is at the very bottom.


I'm working entirely by hand. Before I can stitch, I first have to punch holes using an awl. Then I use a length of 'artificial sinew' (waxed nylon) with a leather needle at each end to stitch through the awl holes using the durable saddle stitch. It's a slow process and hard on my hands.

Here I've stitched the gusset onto the front. If you look sharp you can see that there's a 'welt' piece between the front and gusset. This will produce a nicer result. The stitches aren't perfectly linear. This is because I made the holes from the other side.


Here's the back side. I laid out the awl holes using an over-stitch wheel. This is a spiky wheel that leaves regular marks. Where there's a mark, you punch a hole. Easy peasy.


Now I've stitched the back onto the front and gusset.


You can see the welt here. Notice there are three layers of leather.


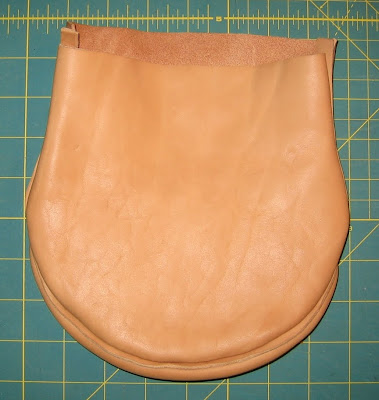
You might have noticed the bag seems to have the rough side of the leather on the outside. That's because the bag is made inside-out, then inverted. I soaked the bag in water to soften it, then turned it inside out. And here it is.


And now two views of the gusset. I suffered to stitch that thing, you're gonna have to look at it!


Now the straps need to be made. I'll continue in part 2.