I didn't care for the stand my lathe was on. It was a skeleton made of angle iron. There was nowhere to place tools, no room for a chip tray, and it wobbled. I decided to build a proper bench.
This bench is about 19" x 72".
The surface is made of three sheets of 1/2" plywood, glued and screwed together, topped with a thin melamine-covered fiberboard sheet. The plywood wasn't the best choice but I already owned it - this material was stuff I had been tripping over in my shop.
The surface is resting on ten 2x4 'joists' spaced 8 inches on center. The joists are supported by 2x8 aprons. The 2x8s are bolted to 4x4 legs.
The ends are 3/4" plywood screwed and glued to the legs.
Here's an apron with it's joist hangers.

Because I could!

The other apron side is completed and the joists test-fitted.

Counter-bored holes for the lag screws. Note the flaw in the wood. I recommend you pay attention to these things.

Here a leg is attached to the apron. I clamped the leg against the apron, squared them, and bored two 1/4" holes through the apron into the leg. After that I opened the hole in the apron to 3/8" so the screw wouldn't split the wood. You can't really see it in these pictures but there's a washer below the lag screw heads.

The aprons and legs all together. The joists have also been attached to the hangers with a screw at each end. There's a good argument for putting a sheet of plywood under the apron to make sure it doesn't bow outward.

A great deal of the bench's strength comes from the plywood ends. I hate raw plywood edges. Invariably I ding them and raise a bunch of splinters. Then I impale myself. I covered up the top and front edges with a piece of 1/2" thick pine, glued and nailed.

I attached each plywood end piece to the legs using Liquid Nails and 44 screws. That's a lot of screws but they are functioning as clamps. Besides, I've had them for 15 years. Might as well use them. They are 'Robertson' screws from McFeely's.
Highly recommended.

And here we are, both ends attached. The base of the bench is complete. If it shows any signs of lateral racking I'll add a piece of plywood or a diagonal support to the back.

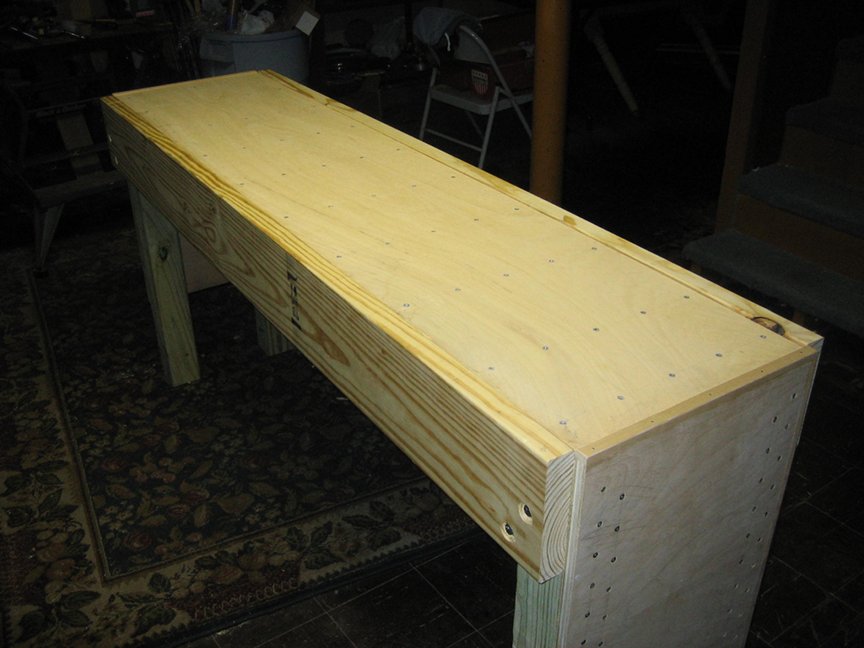
My son and I dropped in the three 1/2" plywood top pieces, spreading Liquid Nails between them. I 'clamped' the plywood sheets together while the glue dried by driving 50 screws through them into the joists. I used some pretty old Philips-head deck screws for this. They cammed out terribly. I'm cured of Philips-head screws now.

Screws. Yah. I could have used fewer. I'm glad I didn't.

I found a piece of fiberboard with melamine on one side. I used double-side tape to secure it to the bench. The fiberboard was leftover from another project. I was delighted to have enough, even if I did have to use two pieces.

And here's the lathe on its new bench. I haven't decided for sure where the lathe is going to sit.


And that's the bench. It's sturdy and economical. I spend about $70 on it, excluding the plywood top and fiberboard.