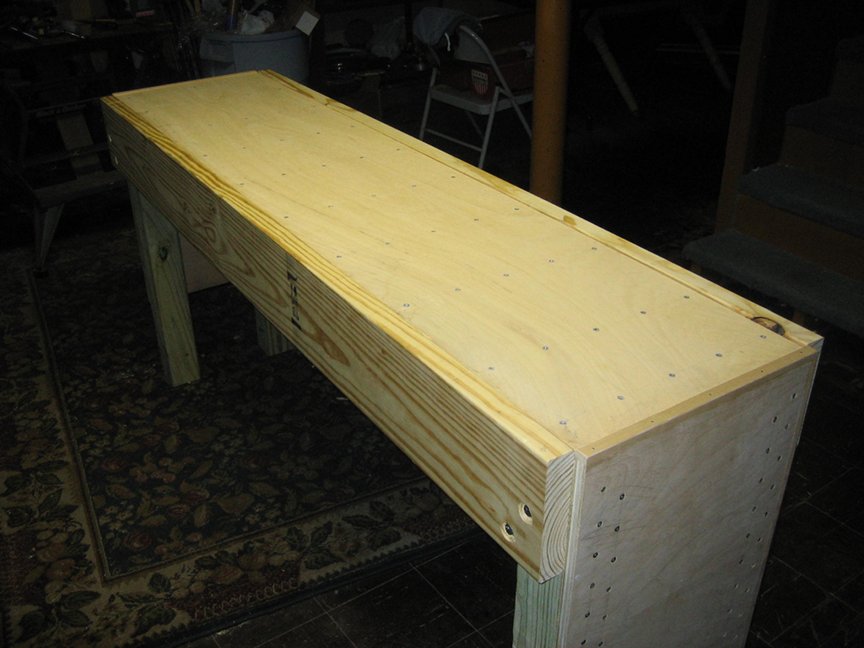
My basement metal shop has been coming to life. The lathe is working well. I've properly mounted the 4-jaw and 3-jaw chucks onto back plates. I replaced my dead bench grinder, bought an arbor press, and a friend gave me a spare drill press (thanks Marco!)
I found that smaller accessories consumed all my flat space, and more. One WorkMate has a sheet of plywood on top - it's my "bench." Of course it is wholly unstable and it's only a matter of time before I dump all the accumulated crap onto the floor. My other WorkMate has become a permanent stand for the arbor press and vise. In addition, I have to use my bar clamps to secure these things!
The solution, other than to get rid of my trash (not happening), is to build a real bench. I've decided to replace the plywood-and-workmate-disaster-waiting-to-happen with an island bench. Then I'll bolt the drill press, arbor press, grinder, and vise to it. This will free up both WorkMates, reduce the chance of dumping fragile things into the floor, and make it much easier to work efficiently in my limited shop time.
So what are the attributes I need for this bench? I need...
- a bench that won't flex when I use a hammer.
- sturdiness to support the relatively heavy bench grinder.
- stability - no shaking, racking, or rocking.
- longevity because I don't want to have to rebuild the bench.
- enough room to mount the previously mentioned tools.
- to be able to repurpose the bench in case my needs change.
Item 6 is actually an interesting requirement. If I skimp anywhere, I could end up with a bench that's is insufficient for the next task. The additional expense is minimal.
The beginning of a sturdy bench is probably the top. If it flexes because it's too thin or disintegrates because it's chipboard, then it will be useless and worse, annoy me. So I started off my adventure by poking around in my plywood pile; I like to use what I already have. Many years ago I was gifted several pieces of 1/2" plywood. In fact, one of those pieces (3' x 4') is currently my 'bench' in the shop. I found I have enough pieces already cut to this size to make a 2" thick top. I did some ciphering and satisfied myself that a 3' x 4' bench would be large enough for the tools I want to mount to it.
Now, I hate an exposed plywood edge. Once dinged, a plywood edge will give terrible splinters. There are two options - 'band' the edge with a piece of solid wood or bury the top into the sides of the bench. I opted for the latter approach. (I edged some plywood when I made
the lathe bench...)
How would I mount the 2" thick, 3'x4' top into the bench? Since I wanted the bench to be sturdy I opted to set the top onto a lip. I came up with using 2x6 for the apron and a 2x4 for the lip. Here's a image showing how these parts are put together and how they relate to the legs, which are 4x4s.
The top will sit very nicely on the 2x4s (and 4x4s), I have plenty of room to get some screws in, and the edges will be wholly covered by the 2x6 apron.
These decisions pretty much set the entire design. The only remaining unknown is the height. I opted for 34"; this height worked well for the lathe bench.
From this I worked out that the long side of the apron is 48". The short side is 39" (the 3" beyond the 3' width of the top allows an overlap, see the image above.) The 2x4 lips are 41" on the long side and 29" on the short side.
I cut all these pieces on the radial arm saw. I used a long fence and a stop to ensure that pieces that were supposed to be the same length were as close as I could get them. This worked well - all 27 pieces are the right length.
This shot is a little too head-on, but there are 4 posts (legs), the four 2x6 apron parts, and various longer 2x4 parts. The stack of corbels is on the left.
Here are all the parts of the top, put down in their relative positions.
The first part of the assembly process is to create the apron pieces. Each 2x4 should be centered on its 2x6, and their bottoms should align. See the background of the leg-with-corbels image below. The part in the background tells you what you need to know.
I glued and screwed the 2x4s to the 2x6s. I didn't skimp on the glue; to me, screws are just clamps and the glue does the work. A happy accident here was that with the choice of 2x4s and 2x6's, no additional work was needed to position the lip to allow a 2" thick top. Refer back to the first image. Note the positioning of the top of the 4x4; it is in effect an extension of the lip. The top will fit in here without any extra work.
What you can barely see in the first image is that the 2x6s are actually resting on what could charitably be called
corbels. These are supports that are glued and screwed to the outside of the legs. Here's a leg and its corbels.
Here's what you get when you put it all together.
So you can see the bench's legs and aprons literally stand on their own. Gravity is great, but how do we position the corbels to begin with? Referring back to the first image, clamp a piece of scrap wood from the the aprons' lips, near the corner. Then simply sit all this right on top of the leg post. The post will butt against the scrap wood at exactly the right height. Grab a corbel, position it and clamp, drill 2 pilot holes all the way into the post. The you can remove the corbel, spread plenty of glue on the backside, and screw it to the post. Repeat for the other edge. Then repeat for the other 3 legs. Easy peasy.
Now it should be pretty clear that the mechanical nature of the construction is going to provide strength. When we bolt the things together, we're just making sure everything stays aligned. In the spirit of overbuilding, however, I use two 3/8" lag screws per leg per side, as you see here.
You can see those bolt heads are countersunk. I drilled a 1" hole using a spade bit deep enough to completely countersink the bolt head and washer underneath it. You do this because if you don't you
will eventually smack your most accurate caliper, that perfectly honed chisel edge, or your favorite knuckle against them. I finished up by drilling a 3/8" hole through the center of the countersunk
hole. None of this was done in place; that is, I didn't drill into the
leg. The reason will become apparent when I discuss how the legs were bolted on to the apron.
TIP - How do you accurately drill the countersunk hole to depth? Make a quick and dirty depth gage by putting a piece of masking tape on your spade bit such that when the tape brushes the top of the 2x6 you know you're done.
TIP - Get thee to Harbor Freight (or where ever) and get yourself a set of transfer punches. They are a set of rods of graduated diameters. One end of the punch is pointed. The other end is for (lightly) tapping with a hammer. You pre-drill a part, position it against a mating part, put a transfer punch in the drill hole, and give it a little tap. The punch leaves a mark on the work that tells you where to drill the matching hole.
Now we have only to reassemble the leg and apron, mark the holes on the posts using a transfer punch, and drill two pilot holes. That would work but I'd like to share a construction tip. In my design, the 2x4s and the posts are supposed to be touching. If they don't touch, it is possible the bench could rack slightly. And once something like this starts moving, it usually keeps moving. That's bad. But the chance of me actually drilling 16 holes in exactly the right place is zero; maybe you can do it, I cannot. But I accomplished this by using an old woodworking technique called
draw-boring. To do this, assemble the apron onto the corbels and get everything as snugged up as you can. Then mark the position on the post by tapping a transfer punch through the 3/8" holes in the apron. Remove the apron and use the hammer and punch to reposition the mark. Because wood is pliable and we're not driving nails here, we can do it without issue. Just re-punch towards the corner that's between the corbels, and down by about 1/16" or a shade more. Drill the pilot hole on this new mark. When those 3/8" lag bolts are put in, they will draw the 2x4s hard against the posts. Perfection achieved, without having to be perfect.
TIP - Now this has never happened to me *cough* but if a person got confused and drilled a pilot hole in the wrong place, not only would the draw-bore not work, it would push the apron in the wrong direction. This would be horrible. If this did happen to me, I would know to salvage the situation by finding a dowel larger than the pilot hole, re-drilling the misplaced hole to the same diameter, tapping in said dowel with plenty of glue, and trimming off the excess dowel once the glue dried.
TIP - We have to drill holes in an apron so the bolt passes through. We have to drill pilot holes in the posts so the bolts will bite without splitting the posts or being unnecessarily hard to screw in. I purchased a set of drills similar to these. I like being able to choose exactly the right drill. (I didn't get mine from Amazon, that's just an example.)
Once the aprons and legs were bolted together, I added three joists. These will help prevent the top from sagging over time. I attached the joists to the apron using deck hangers. I positioned the tops of the 2x4 joists in the same way I positioned the posts - I clamped a scrap down to the lip and made sure the joists were in contact with it.
Extra points if you use 2x4s that are slightly crowned, and you put the crowned sides up.
In addition to showing how everything fits together, this image it also shows what happens the instant you think you have everything control. Note the extra holes in the apron. I did not realize that the bolts in adjacent faces could collide with one another. The bolts farthest from the posts won't - but the closer ones will. While making this mistake annoyed me, the fact is that it doesn't matter, except for my pride. Once the bench is completed, I'll plug these holes.
Stay tuned for part 2, wherein I put on the top, and finish the base.